


In graphic world, knitting design means all the intertwining textures inspired to the typical structure of works made using crochet or knitting pins. These patterns, usually mixed with reindeers, snowflakes and snowmen images, are often associated to the traditional nordic sweater.
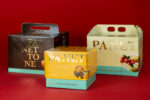
Being directly connected to the traditional nordic Christmas gift, knitting decoration became a very inspiring style in the last years, often used to promote seasonal products or events during Xmas time. Boxes that look handmade, flyers, banners, etc.: artworks wear their best party outfits. The typical knitted patterns are widely known and you can download any kind of them directly online, both in vector and raster file formats. Once you have chosen the motive, you can use it for your background texture and for the main decorations as well: what you have to do is just set up the colour you want to use.
If you are not a vector graphics specialist you can download and use the wide range of motives available on the web, but if you are able to use graphic design software and you want to enjoy a unique and original creation by yourself, follow our short guide.
Before starting, I have to remind you something very important: the pattern basic unit is included inside a square and its repetition will generate the end result. Your visual motive must be inscribed in that geometrical form and be designed to proper complete itself while repeating”.
How to realise a knitting design pattern with Illustrator
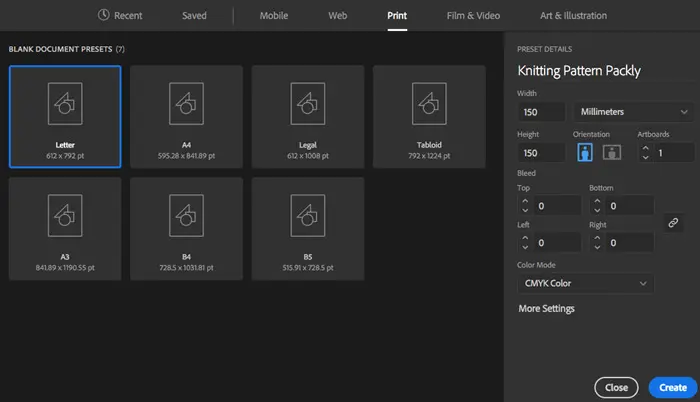
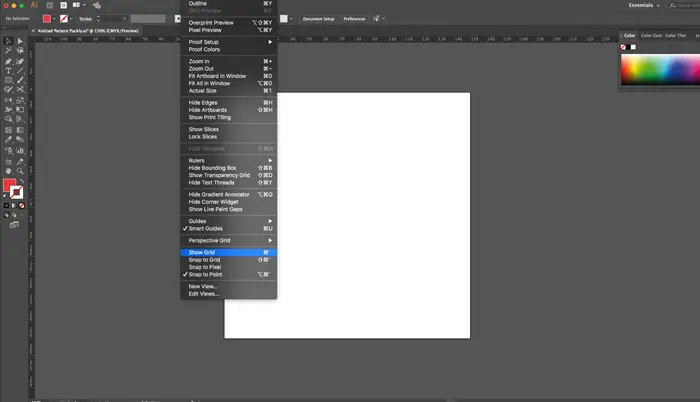
- Create a new document and set the sizes you prefer to create your pattern. We have realised a canvas of 150x150mm. Show the artboard grid: View > Show grid

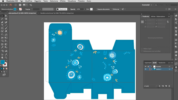
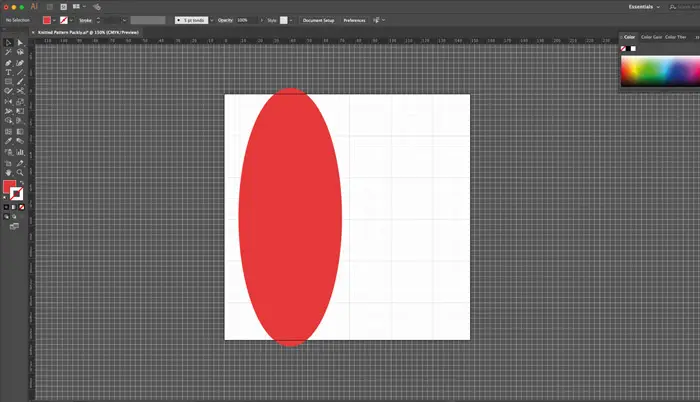
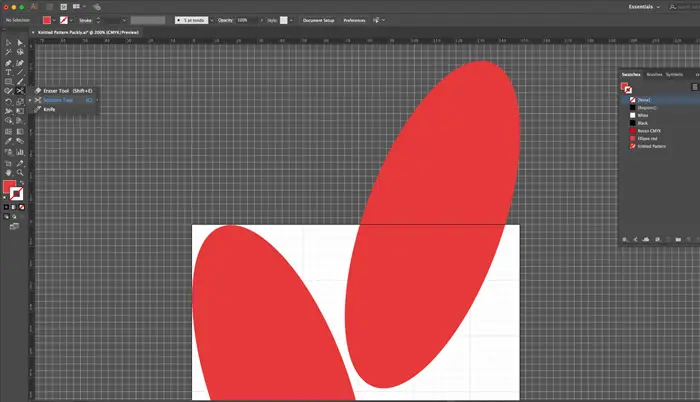
- Realise the basic unit of your pattern. Create an ellipse of 63×157,5mm using the specific shape tool. Set up the fill colour as: C=0 M= 85 Y= 70 K=0
- Rotate the ellipse 10°: Object> Transform> Rotate. Align it to the left of the canvas and then select “Vertical Align Center”.
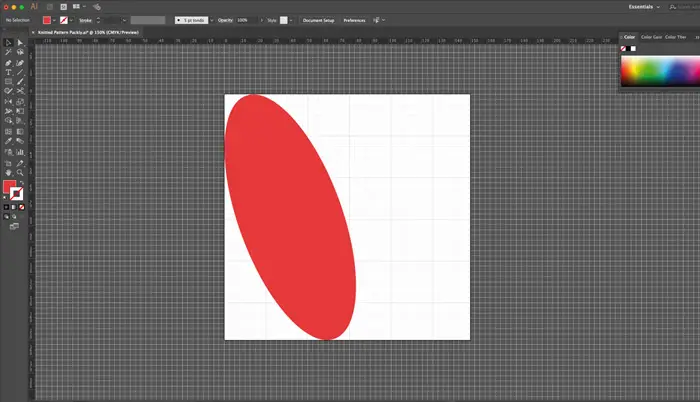
- Select the Reflect tool and create a copy, vertically reflected, of the ellipse: Object > Transform > Reflect
- Align the second ellipse to the right and move it at the top: half of the ellipse must be inside the artboard and the other one outside of it. Add two anchor points, using the Pen tool, over the two intersection points between the canvas and the ellipse. Select the Scissors tool and cut the elliptical path at the two points just created.
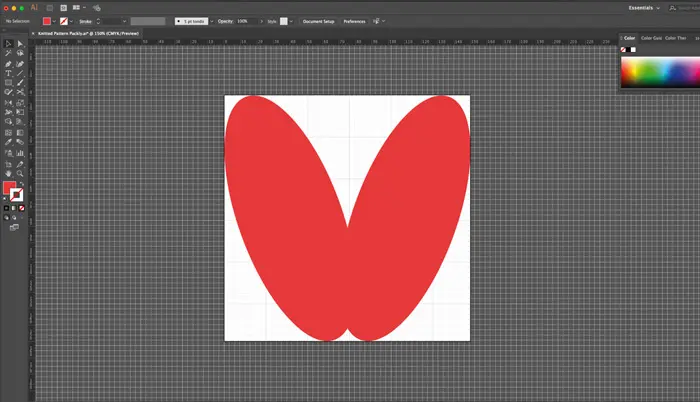
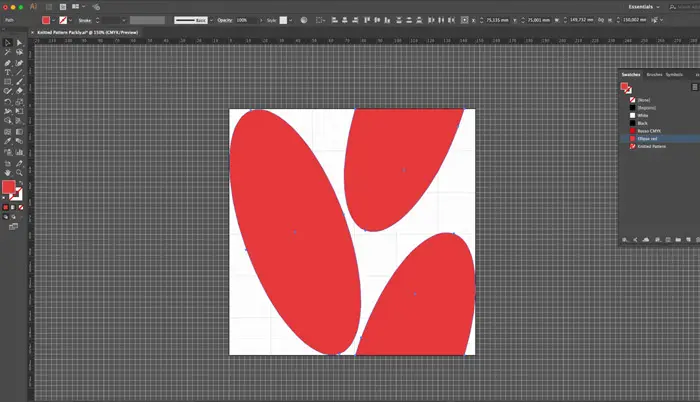
- Move the top of the ellipse at the bottom of the artboard. Select all the elements, drag and drop them inside the Swatches panel: Window > Swatches .Your new pattern is ready to use.
- Save your Swatch Library with the Swatches menu and start to use your Christmas texture!
Take note:
You can change sizes of your fill patterns selecting the object including it and scaling the pattern using the specific tool: Scale tool > Transform pattern
The final result? Look at it!
- Background colour: C=15 M=100 Y=90 K=10

And to make your life easier… download our ready-to-use EPS files!